Here is another way:
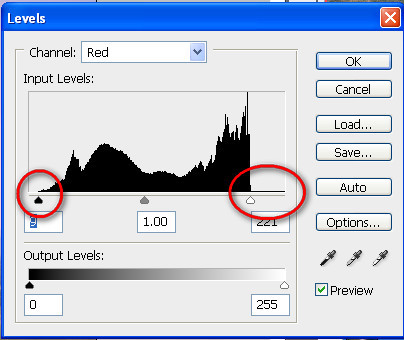
Taking your pic, what next, Photoshop CS3 – Image / Adjust Curves
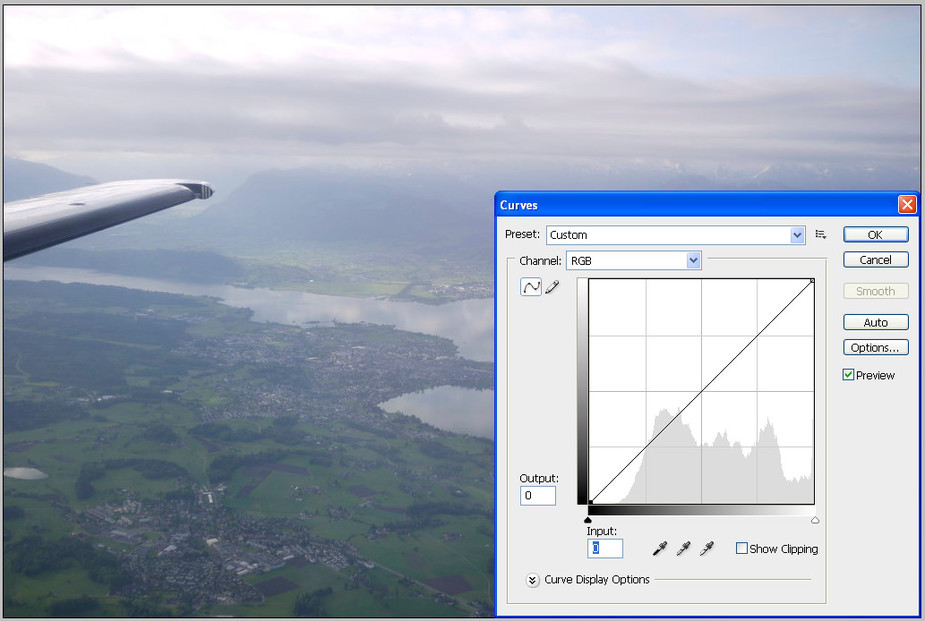
Do Red, by sliding the left slider to the point where the “spectrum” starts
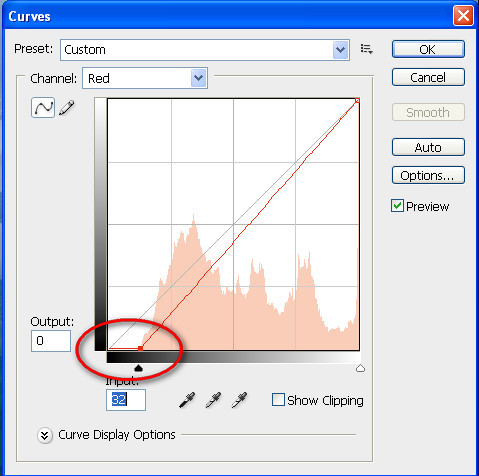
Then repeat for Green and Blue. Result:

The result looks fairly realistic.
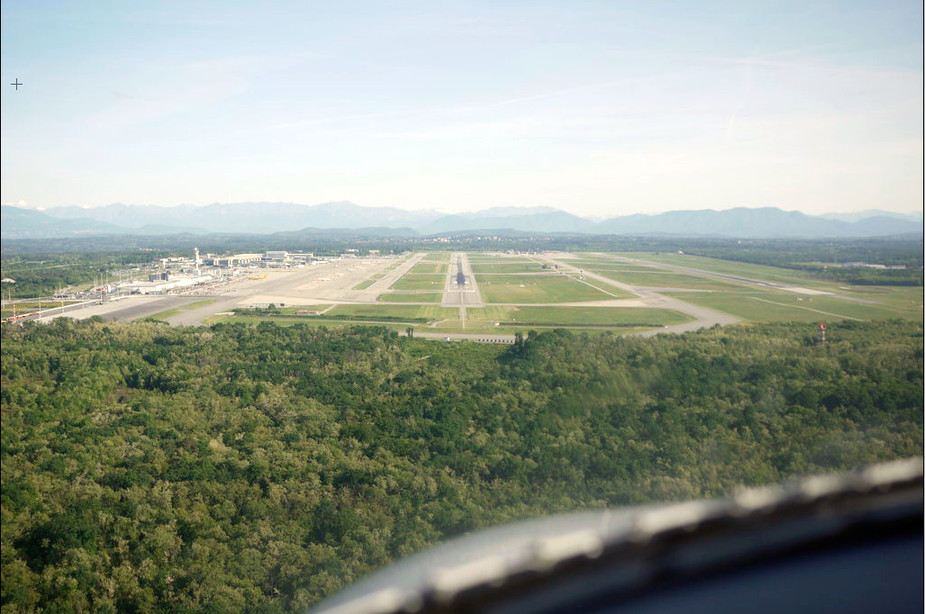
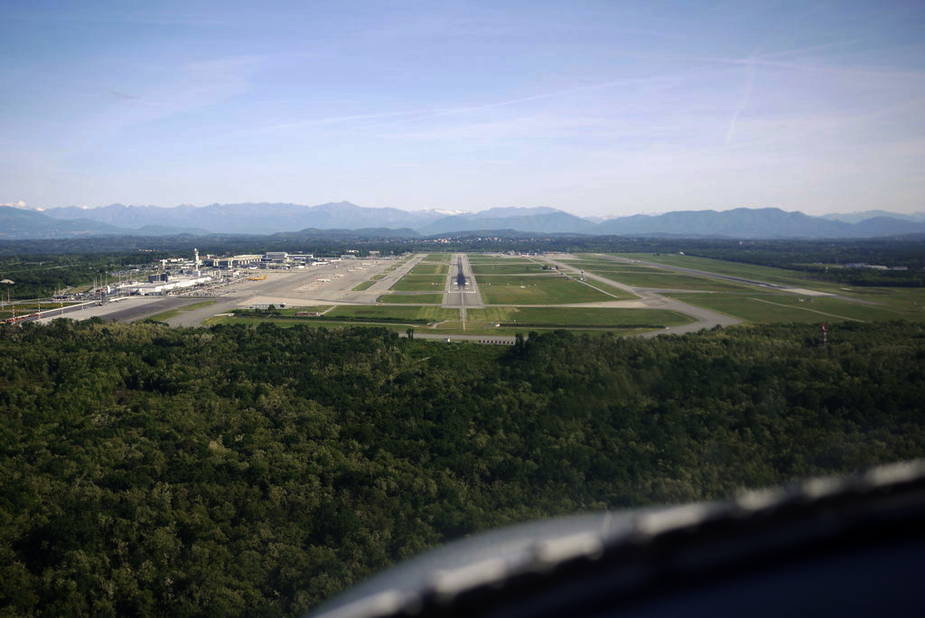
Taking your Milano final approach pix, the tweak is required at both ends, for each of the three colours
Result:
I find the Blacks function is very similar but it is available with RAW files only. It is much faster than the above Photoshop process, if you have a whole trip’s worth of pics to fix up.
The obvious drawback is that there is still a lot of haze in the distance, in most flying pics.
BTW, I believe the quick and dirty technique for reducing reflections is to “zone off” the offending region (various ways to do that in different apps) and increase contrast inside that region alone.
OTOH there is a point of view that realism has no place in photography, and judging from how crudely a lot of pics are photoshopped/lightroomed, many people seem to agree. Real life has very few strong / vivid colours, unless you are on the ground, in sunlight, and photographing a flower or something like that…  Many professional photographers go for the vivid “wet surface” look, especially with vehicles on which that would require a lot of exertion (waxing etc) if shot straight.
I can say most confidently that I am one of the least experienced Photoshop users on the planet, but I have found this thread interesting.
The use of curves to reduce haze seems to be a “black art”, and there is the “de-haze gradient” that Peter mentioned.
As I was interested, I googled around on the web, and found a number of papers on this, e.g:
Yu-Ding-Rong-Zhabg (local copy)
Although the papers are quite sophisticated, the basic ideas seem simple, and I think they can be used in Photoshop or similar programs which allow the use of curves. I have tried to see what curves are suggested by the physics.
As I understand it, the basic physics behind haze seems to be expressed by the following equation:
I = tR + (1-t)A
‘I’ is a pixel value in your photo image, corresponding to an area in the real scene of brightness ‘R’.
‘t’ is the fraction of the light at the camera which comes from the real scene.
That real scene light comes to the camera along the line of sight, and is mostly degraded by Mie scattering, which does not depend on frequency much. In this respect the value of ‘t’ should be lower with greater scene distance and higher air particle counts. But ‘t’ should be the same for all the colour channels.
As well as real scene light disappearing en route to the camera, so-called “Airlight” or “Atmospheric Light” comes along for the ride, this is the ‘A’ in our equation. This is light scattered into the line of sight by the atmosphere. Depending on the weather conditions, this may be white to pale blue if there is significant Rayleigh scattering, which favours blue, (plus whatever the camera does). In respect of airlight too the value of ‘t’ should be lower with greater scene distance and higher air particle counts. The amount of airlight has nothing to do with the original scene colour, so once again ‘t’ should be the same for all the colour channels in the original scene.
Now we can extend the equation to deal with RGB colours:
Ir = tRr + (1-t)Ar
Ig = tRg + (1-t)Ag
Ib = tRb + (1-t)Ab
Re-arranging the equation in the form:
(I-A) = t(R-A)
throws up some interesting points:
First, at very great scene distances (e.g. space), t=0 and so A=I, in other words we can estimate ‘A’ from any visible sky (though the papers have many ingenious but much more complicated techniques).
Second, because t<1, haze reduces the image contrast, but specifically it reduces the deviation from the airlight value. We cannot blindly use a “contrast tool” to eliminate haze, unless we are lucky. To reconstruct the real scene we must increase the contrast according to the formula:
(R-A) = (I-A) x (1/t)
Specifically for each colour channel:
(Rr-Ar) = (Ir-Ar) x (1/t)
(Rg-Ag) = (Ig-Ag) x (1/t)
(Rb-Ab) = (Ib-Ab) x (1/t)
We can represent these as the following curves, which I had to clip because ‘1/t’ is greater than one. In each case the slope of the line is ‘1/t’, and the line goes through the [A,A] point.
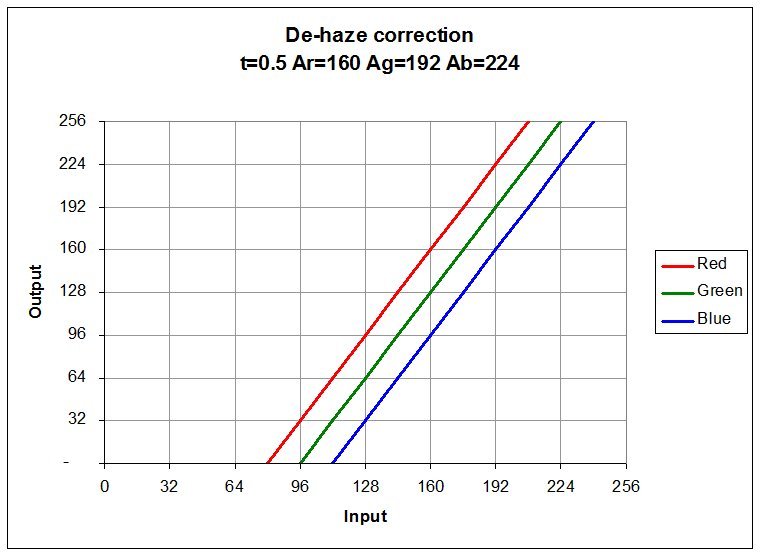
I wrote a program to try this out, and these clipped lines did not work well, introducing colour casts in certain bright and dark areas.
So I mitigated the clipping a little, fitting cubics (there may be better ways), which worked better:
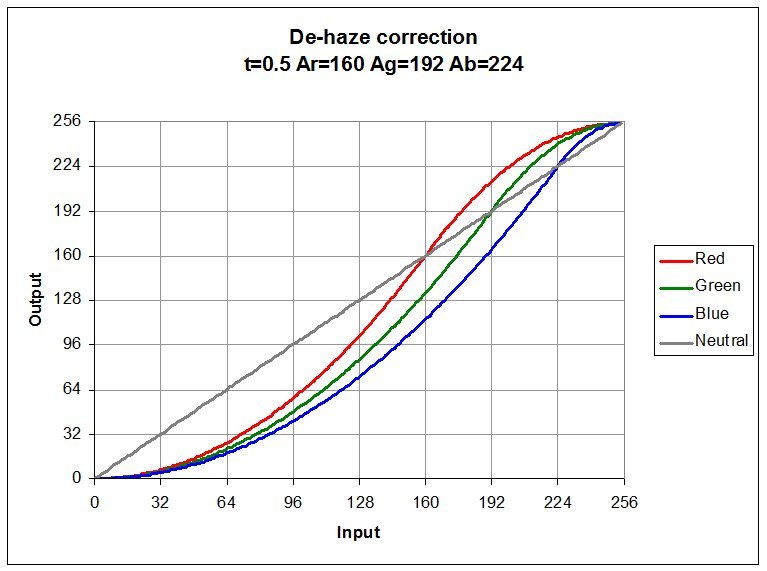
One interesting point about these curves is that you might get something similar if you follow the ‘what next’ workflow, including his increased exposure step.
The ‘graduated de-haze’ that Peter mentioned can be addressed crudely by varying the ‘t’ value between the top and bottom of the picture. Obviously this works better for flat ground than for mountain scenes. In my program I couldn’t be bothered with that so according to pixel row I interpolated between two images: one high ‘t’ and the other low ‘t’.
I expect in Photoshop or similar you could do the same with a graduated mask, bright at the top and dark at the bottom?
You could even adapt the mask to take on the shape of an inconvenient mountain?
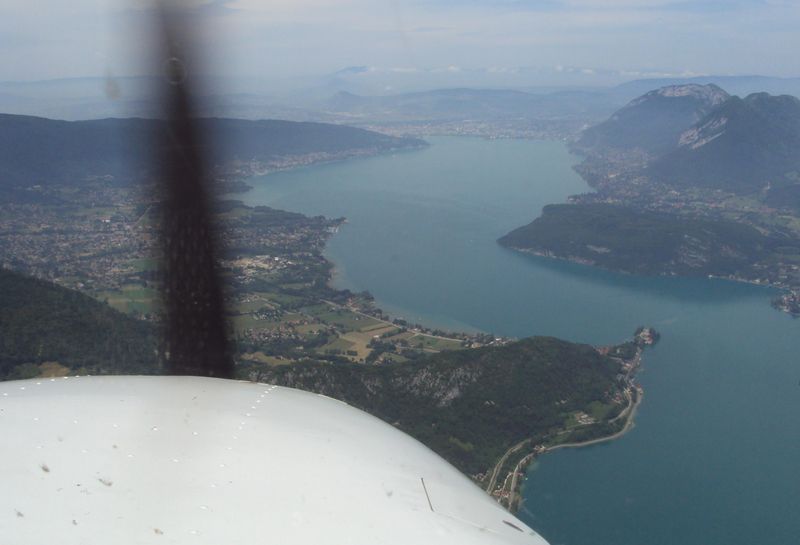
Anyhow, I experimented on this hazy picture of Lake Annecy, taken through a c172 window, complete with two(?) camera reflections, and also the prop which will illustrate a weakness of the method. I estimated the airlight from a bit of sky as 177,188,201, and found by trial and error t=0.4 for the top of the picture, and t=0.7 for the bottom.
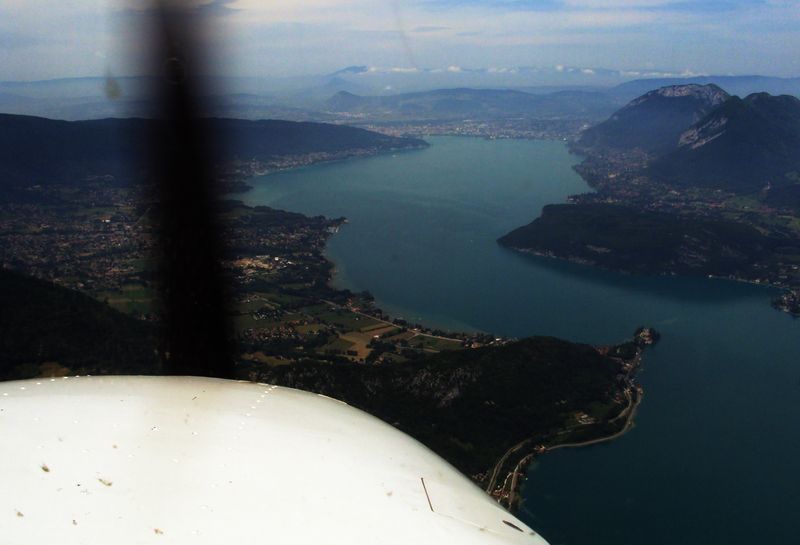
Doing the whole picture at t=0.4 was too harsh at the bottom.
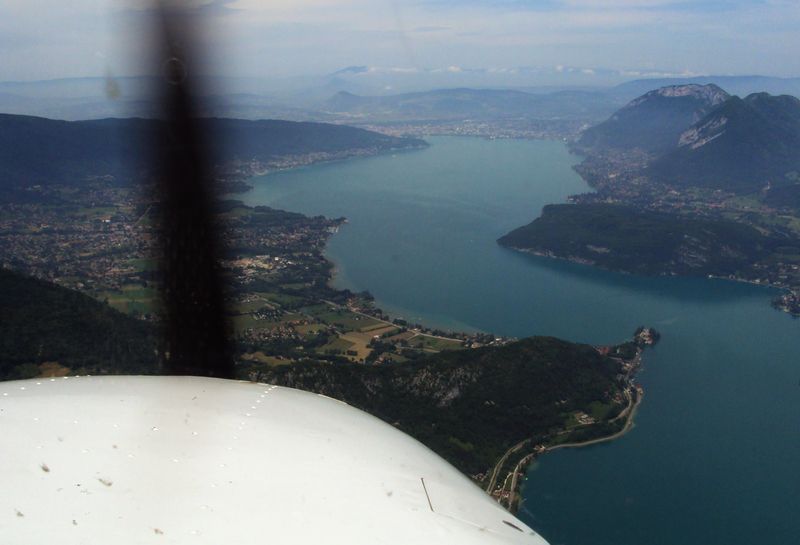
Doing the whole picture at t=0.7 was too weak at the top.
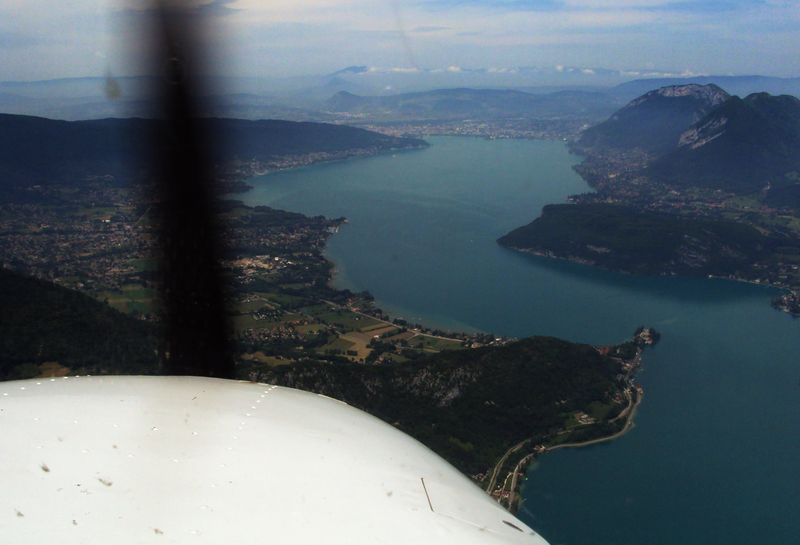
This is the graduated correction
These are the red and blue curves I used (green was in between).
There are three lines for each colour: max, average and min.
Max and min correspond to the highest and lowest curve values actually used in the picture, and so they should be quite close to the actual t=0.4 and t=0.7 curves.

The weakness of this graduated approach is shown up by some of the mid-distance mountains, but most obviously by the prop.
According to its picture height, the prop is at infinity and gets the maximum t=0.4 correction. It is also quite dark, so that correction really bites. It is much too prominent now.
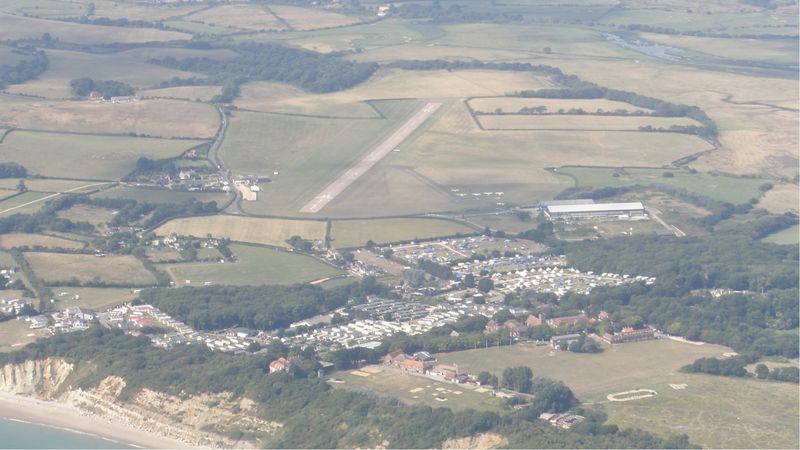
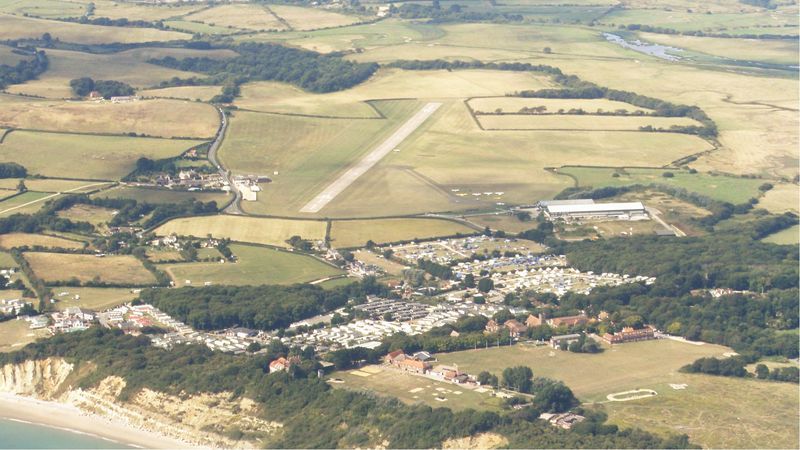
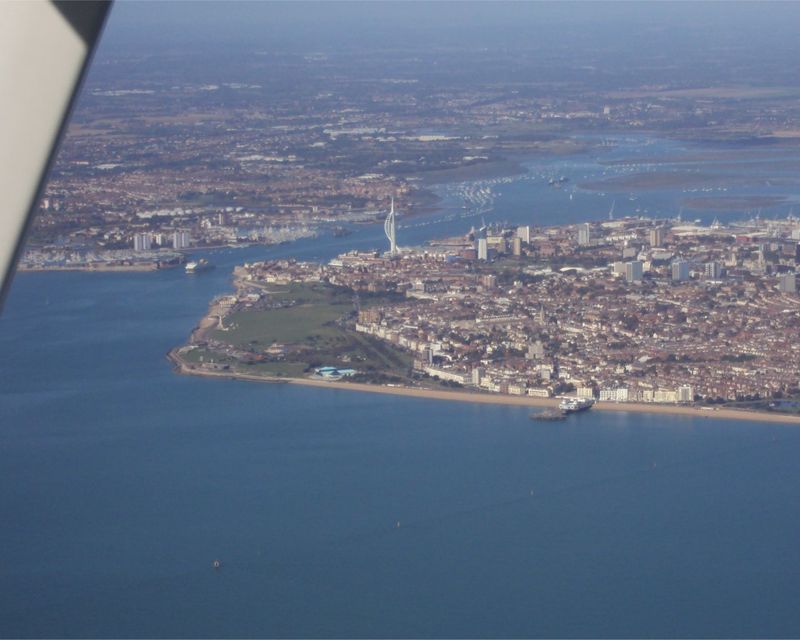
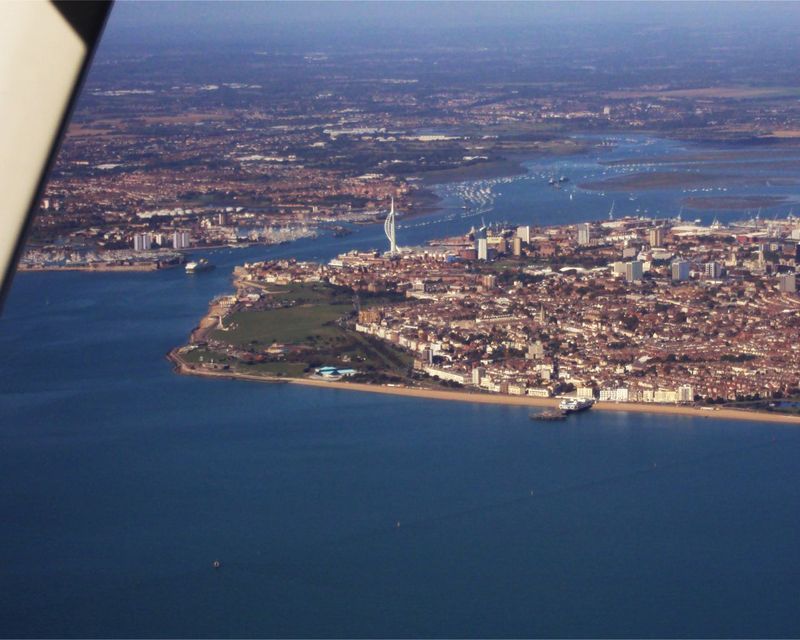
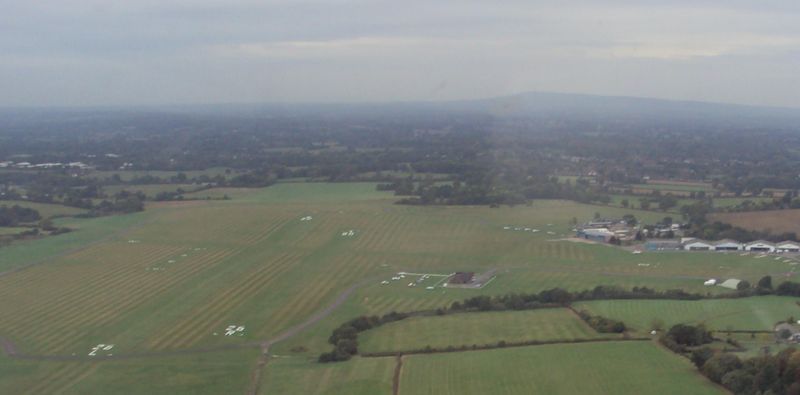
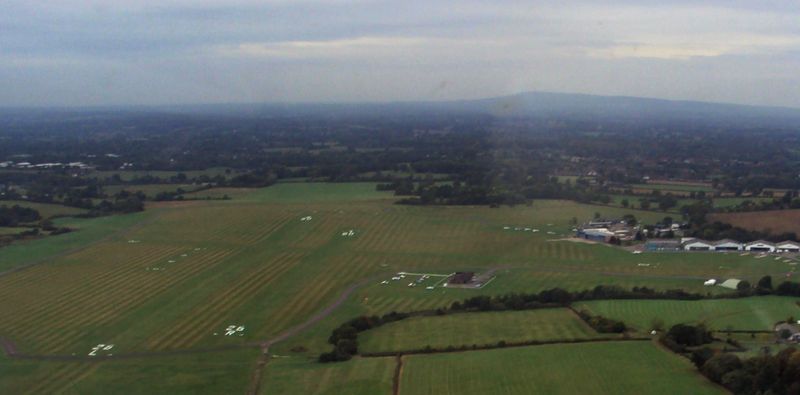
Here are some more before-and afters (Bembridge, Portsmouth and Redhill). Chosen purely for their haze and differing lighting conditions, not their artistic merit! I had no sky to give me airlight for Bembridge, so I used some sky from another photo on the same day, which is probably why the colour looks a bit off.
Finally here is my take on the ‘what next’ Milano shot (airlight=217,225,246 t=0.4-0.6):
I will try to fix the images for you David. Damned Imgur is obviously not serving them… Best to use the drag/drop method and upload them to EuroGA directly.
if there is significant Rayleigh scattering, which favours blue
That is why, in my post higher up, I suggest doing the R G and B separately. Some tools present just the composite RGB “spectrum” and that doesn’t work well for haze.
Just read your post properly, David
That’s an amazing effort! Did you write a standalone 24-bit bitmap (say BMP) processing program, or some kind of Photoshop plug-in?
It would be great to have a tool which just had a slider for the “slope” of the function.
I just noticed that our editing attempts crossed!
It was my mistake, I was using the wrong kind of imgur link, I needed to use the second one down marked: “Direct Link (email and IM)”, not the first marked “image link (email and IM)”. It turned into an epic edit session because there were so many files, and I could not remember how long the “edit window” was.
I wrote a C++ program which reads command line arguments (original BMP filename, airlight rgb, and slope-range), does the correction, and writes out the corrected BMP file. I have never actually used Photoshop! I do have a rather ancient version of Paint Shop Pro (c 2000) which has “Color Adjust Curves” and originally I had planned to find out what to put into that. Now I may just use the program.
In terms of sliders, you would need two: one for the slope, and one for the airlight point. If you do not increase contrast about the airlight point for each colour channel I think you will introduce colour casts. Just playing around with the blue airlight point converts a sunny day into a dull one!
An interesting thread for sure.
However, it is my experience – and the above confirms it – that tinkering, trying to get rid of the haze too much much will let the pics come out too dark. Unrealistically dark. Even where this is not the case (take the Bembridge photo above) people often overdo it by adding too much contrast, which doesn’t look realistic either.
Some haze is a fact of life in airborne photos, so I tend leave some haze in there and not overdo things when editing my photos. Straighten out and crop, add a slight bit of contrast, darken slightly and add a bit of colour, possibly with a very slight shift towards red. Anything more sophisticated would also take me too much time for my taste.
The edit window is 2 hours but David or I will happily do edits/fixes afterwards if required.
I am a real novice on Photoshop – have used v7 for about 10 years, and more recently CS3 – and maybe it already has a function, or a 3rd party plug-in, which does this. But I have never heard of it… there is definitely a way of applying graduated corrections but it seems quite complicated. Same comments for Lightroom and ACDSEE PRO v7.
BTW, Photoshop and Lightroom are not being sold anymore AFAIK. Adobe (who own both) are moving to a rental model, c. 10 quid a month. IMHO this is poor value, but others disagree.
Back to bitmaps, most of my airborne photography is RAW (DNG format) and that is probably very close to BMP. I believe there is some RLL compression. The ability to de-haze JPGs is more limited – it depends on how jpg-compressed the file is. I find they are quite easy to wash out either the shadows or the highlights if you try to do too much.
Hi Peter,
yes the cockpit shot was HDR, the other one not, just a bit improved in Capture NX2 (my favourite photo editor) but I also use Photoshop CS6 and some simpler stuff like the editor in the Mac’s preview window. I have no idea about HDR in videos!
I am thinking about installing a photo window in the Cirrus, … but I am hesitating because the one i installed in the Warrior is always whistling, and also on the Cirrus it will probably look real ugly …
Guys, forget all your nerdy stuff.
This is the future: Adobe makes the impossible possible with their haze removal tool
One slider.