Yes; people do care. I am in a hangar where there is a lot of in/out movement. The movement is all done by the fire crew, which – having been in other scenarios – is mostly a benefit because you don’t get “mysterious damage”. But it means one has to work with the system. I used to be in e.g. a private maint co. hangar where, on a weekend, somebody would leave a plane with the brakes on and locked doors, in front of yours.
If one doesn’t like this, one can buy an RV and move to a farm strip. The prerequisite for acceptance there is a) you have an RV and b) your grandfather fought in the Boer War with the owner of the strip.
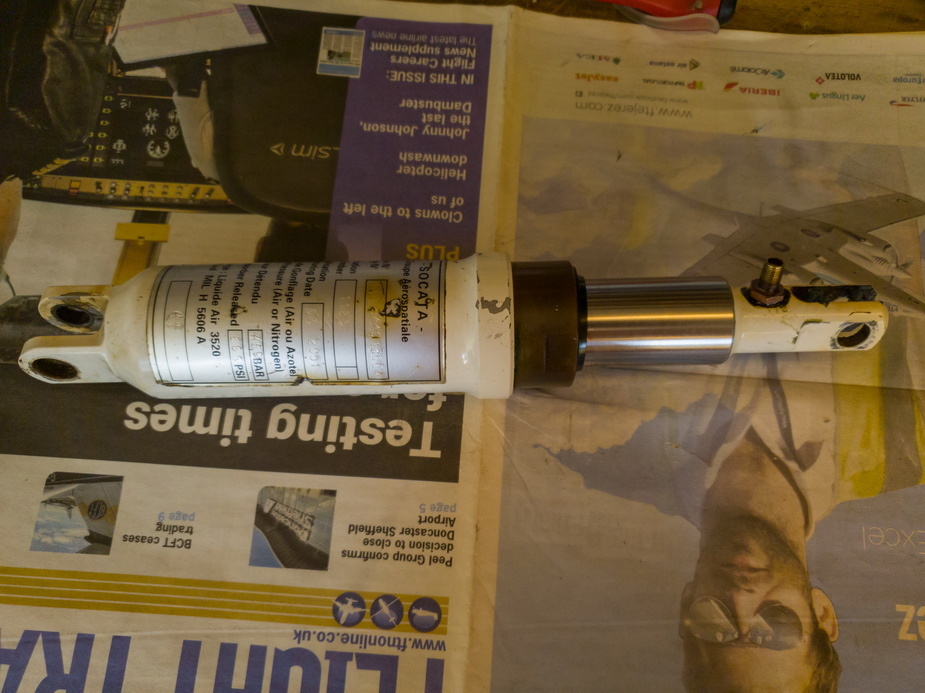
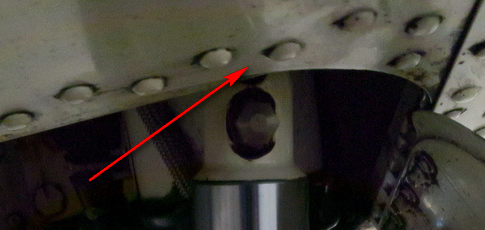
I am gonna look for a spare gas shock, to keep on the shelf. I already have a pile of avionics spares, and have not done this area because I’ve had zero issues with “airframe parts” for 21 years. Any contacts? TB20 41013004, previously TB20 41007004.
I am hoping that when this one is opened up, I don’t find a scratch on the chromed rod… Is there a repair procedure? Weld a line on top and then grind it down?
In the absence of major corrosion pitting, I think seal replacement will likely fix the leak. Unworn seals are better than one imagine at tolerating minor chrome damage.
BTW leaks can sometimes be caused by something simple – a piece of dirt stuck to the seal lip, or have no easily identifiable cause. Sometimes you can fix the leak simply by inserting a thin piece of plastic between the seal lip and strut, and rotating it around the circumference. You’d obviously need to vent the strut first.
I got the parts in and discovered that some were 2-off but I ordered just 1, so I have enough to overhaul just one shock 
In my business we would never fulfil an order in that way. It is the consequence of the reseller knowing nothing about the parts and just ordering back to back from the factory.
Almost there – need one more hose
OK here we go. Job done. Some of it is quite weird but easy enough once you know how.
Start with the CMM (component maintenance manual) – in theory without this you cannot do anything with the unit and have to buy a whole new one from Socata. Cost? Well into 4 digits I reckon.
32_12_02_Shock_Absorber_TB20_R_pdf
Then from the IPC (illustrated parts catalogue):
landing_gear_34_36_2018_pdf
P/N 7061080747 is now 40422015.
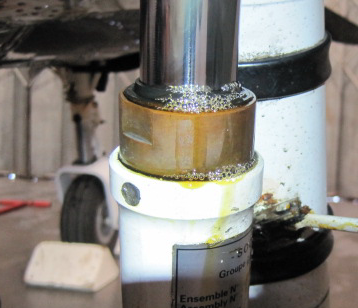
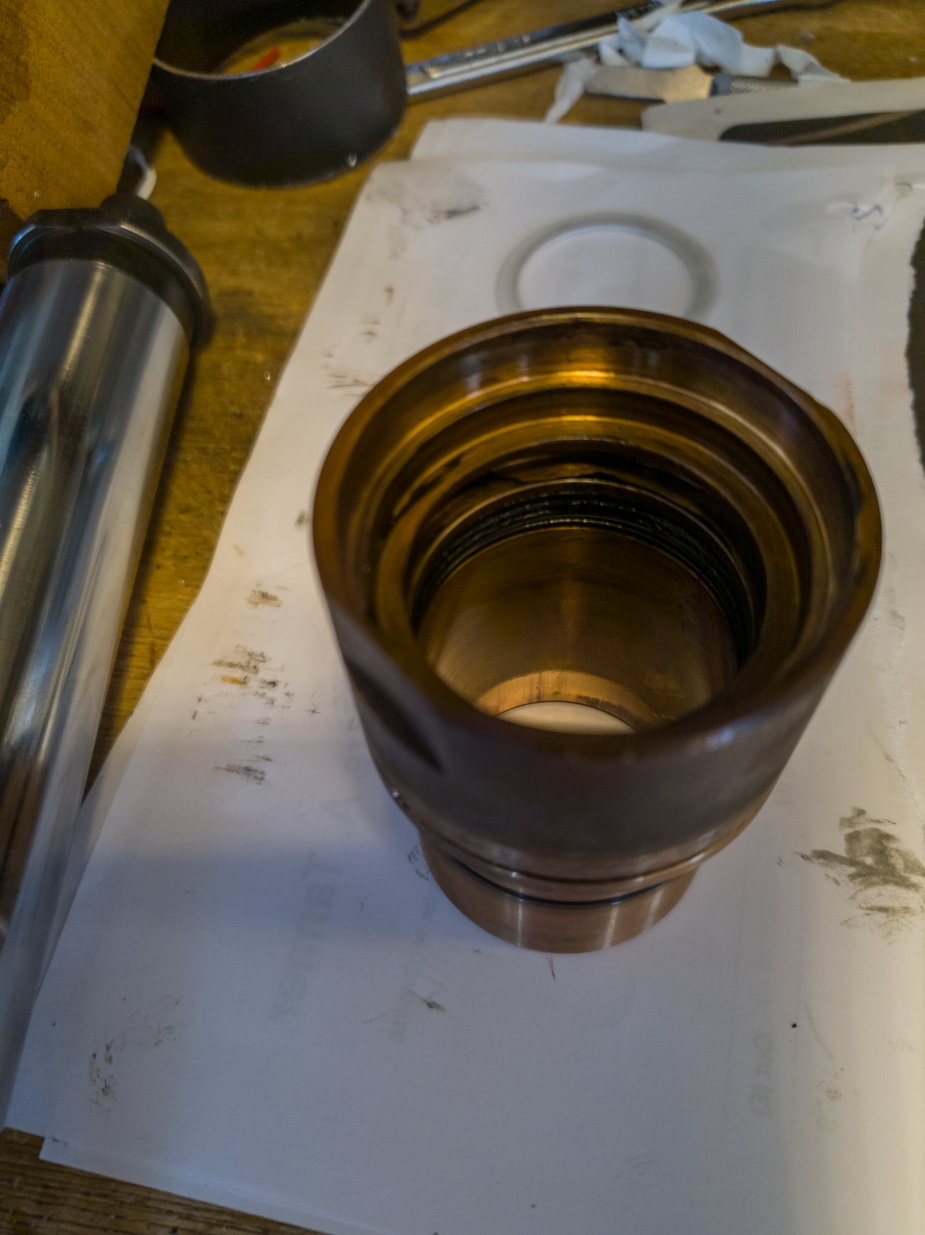
The shock was leaking really badly
Removing it from the plane was hard work because the bottom pin never moves, so despite my plane having been thoroughly greased since it went N-reg in 2015, the pin was seized

Release pressure carefully (by unscrewing the valve core) and drain the fluid through the valve as much as possible. If you operate the shock now, a jet of fluid will shoot out everywhere
Safety first: before you unscrew the valve core, the pressure must be released by depressing the valve plunger, and making sure you keep the strut vertical with the valve uppermost if you are not ready to catch all the fluid! Only then can any residual pressure can be released by removing the valve core. Even when the strut is fully extended, it can contain a pressure of nearly 700psi, and unscrewing the valve core will produce a projectile approaching mach 1.
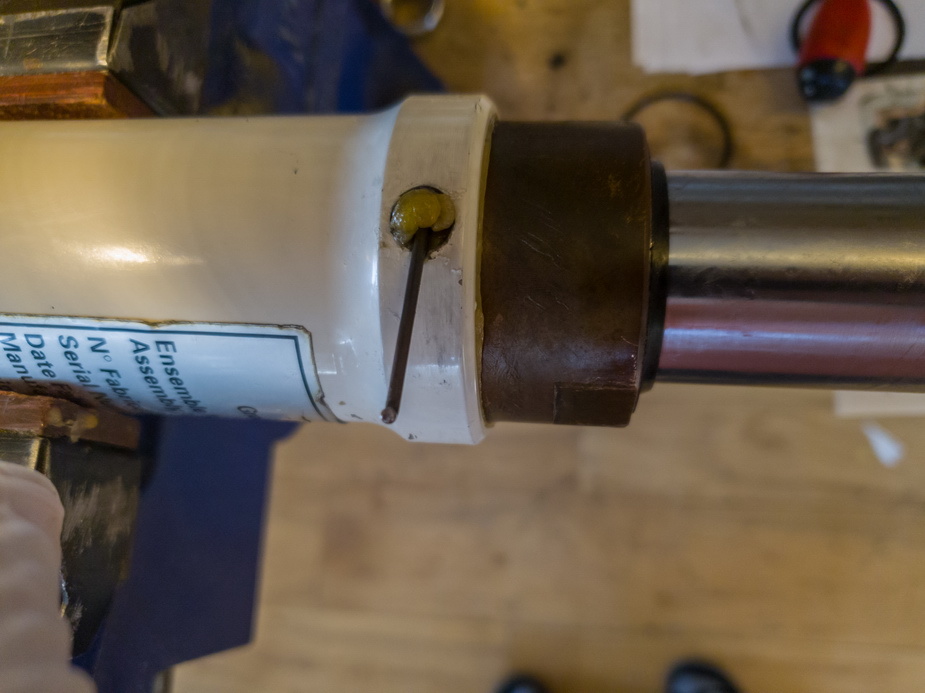
Note the lead plug which was hammered into the hole. You have to dig this out (with a screwdriver or whatever)
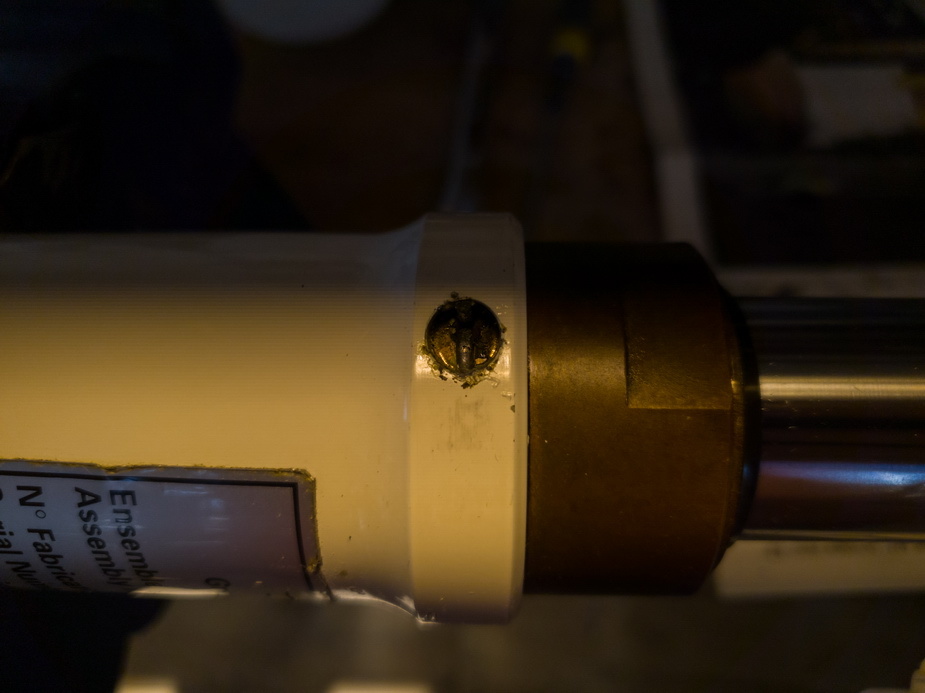
This is the weird bit. Rotating the sleeve CCW, a steel wire starts to come out of the hole
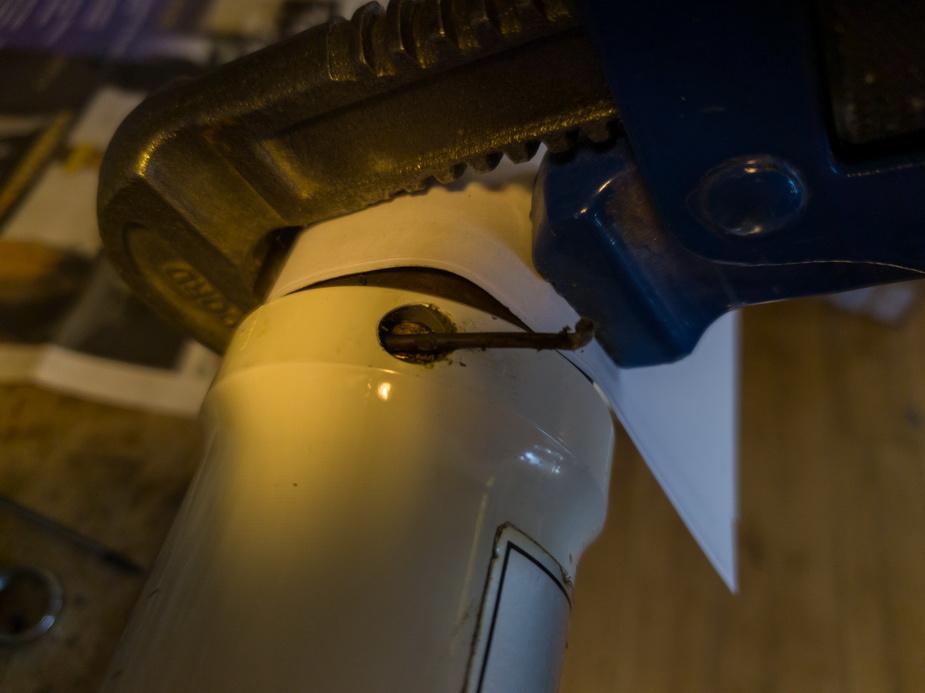
and keeps coming out
This is the whole pin. People re-use it but it is better to buy a new one

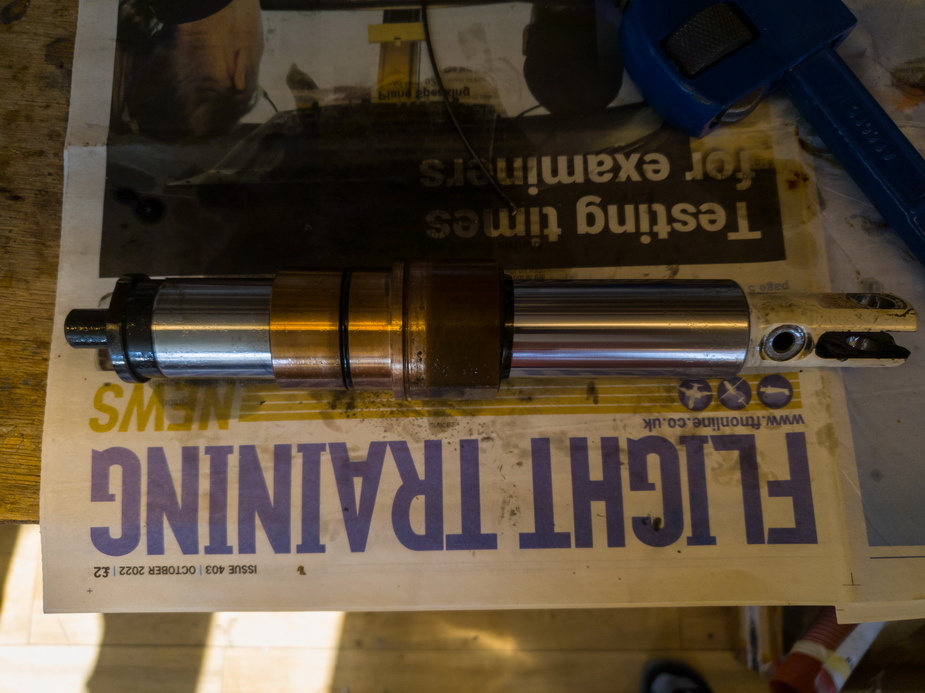
The innards extracted
The top seal was a bugger to get out – they always are due to the steel outer ring – but it came out with some mangling. Be careful to not dent the mating surface of the sleeve

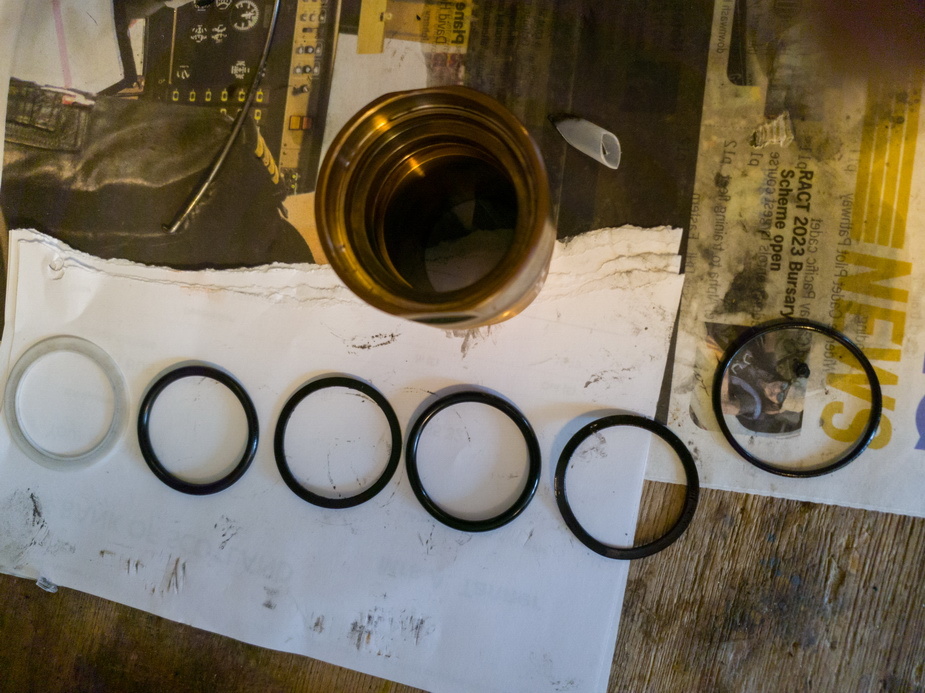
The sleeve with all but one seal removed
Clean everything and inspect for any dents, scratches or damage. Anything like that will make seal replacement pointless. Hygiene is vital in this job; any grit inside will ruin the new seals fast. That also means that refilling the fluid needs clean containers, and filtered fluid. Use the fluid (or Parker-O seal lube) on all the seals when reassembling it; don’t do it dry.
The complete set of old seals, in sequence (white ring was at the top, right under the top seal)
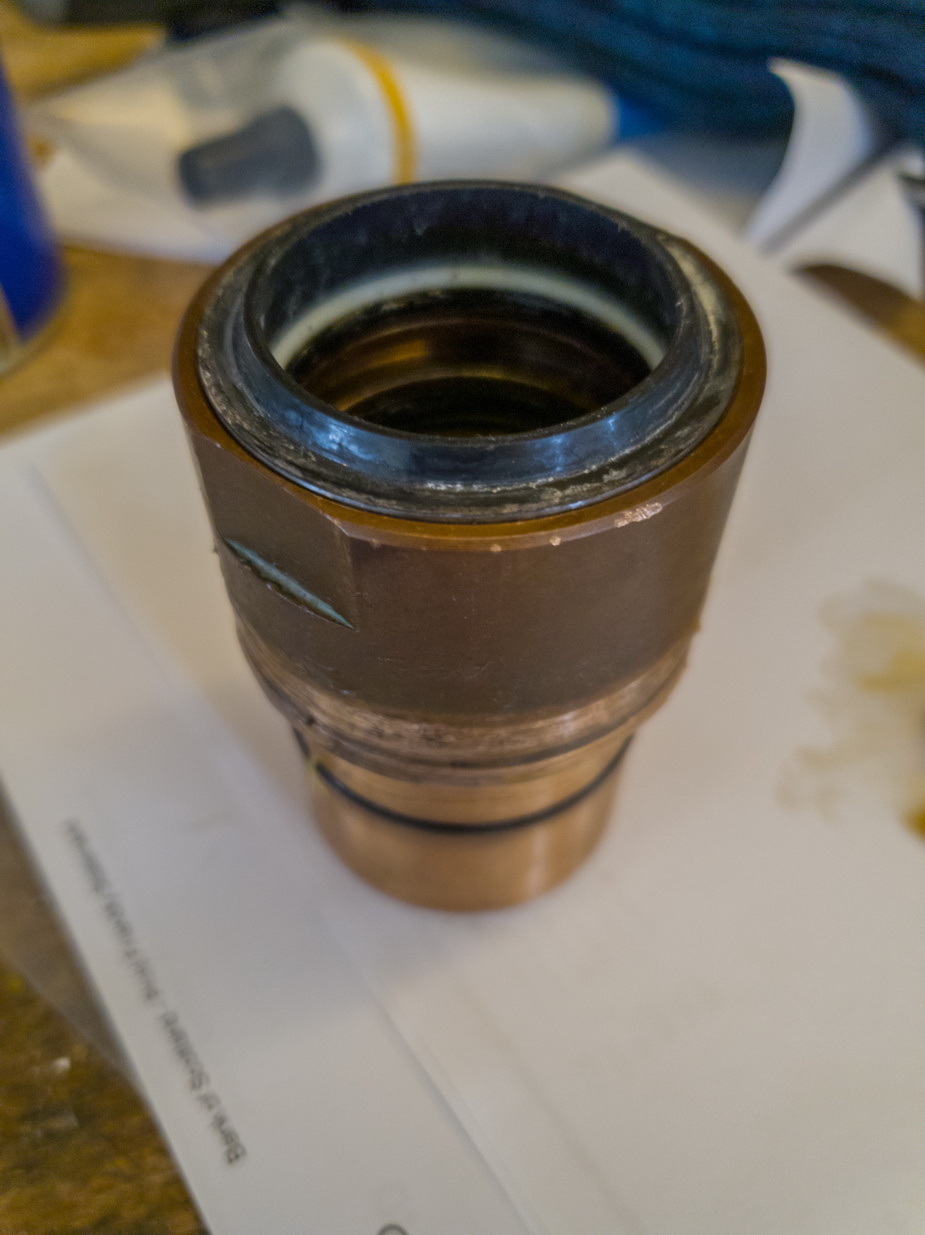
New seals all in, and the top one pushed in using a homemade press to get it in squarely
Ready for the “funny wire operation” in the other direction. The CMM specifies a funny corrosion protector (Mastinox) on the wire but this comes only in big packs and costs a fortune, and Grease 7 is fine (use lots of it). I am 100% sure Socata didn’t use Mastinox either; the wire came out completely dry.
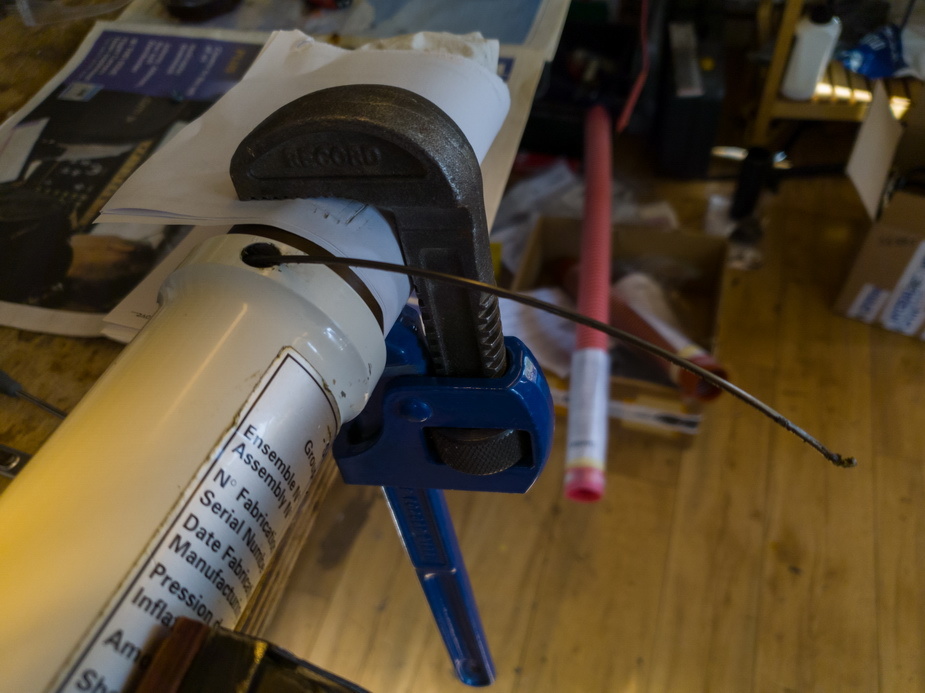
Feed the wire in (kink facing down, so the sleeve picks it up and feeds it in) with CW sleeve rotation
Rotate until the wire end disappears in the hole but no further. Make sure there is plenty of grease being taken in as the wire disappears. If this wire goes rusty it will be hard or impossible to open the unit again. I am not sure that wire is stainless steel!
Finally, hammer in a new lead plug. This is a crude method which will hardly be waterproof, so put some silicone sealant over it as well.
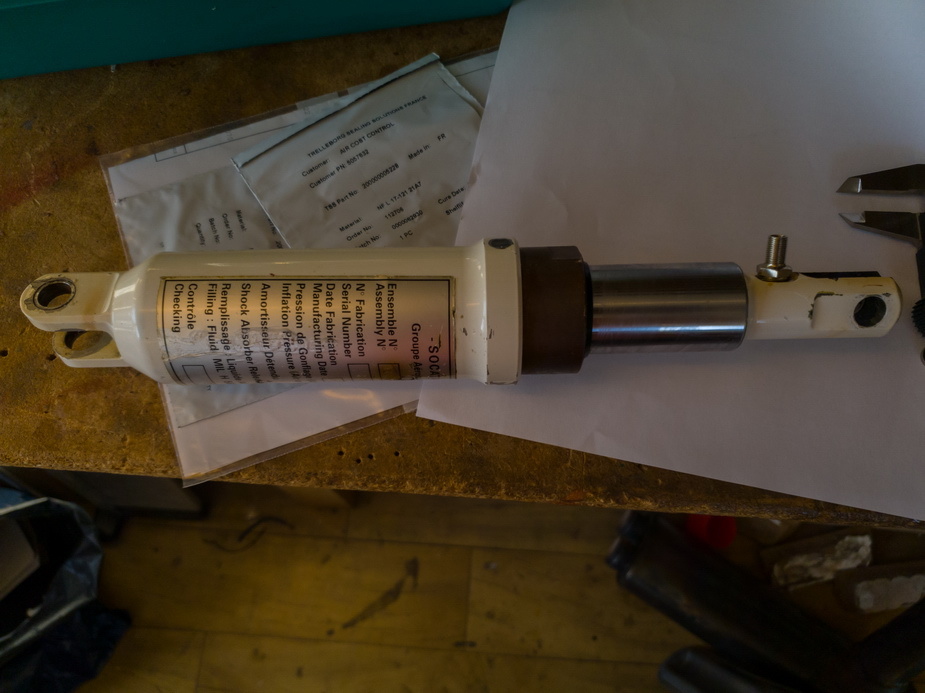
Finished unit
To prevent water ingress, corroding that wire, use a silicone sealant (after degreasing, obviously) here

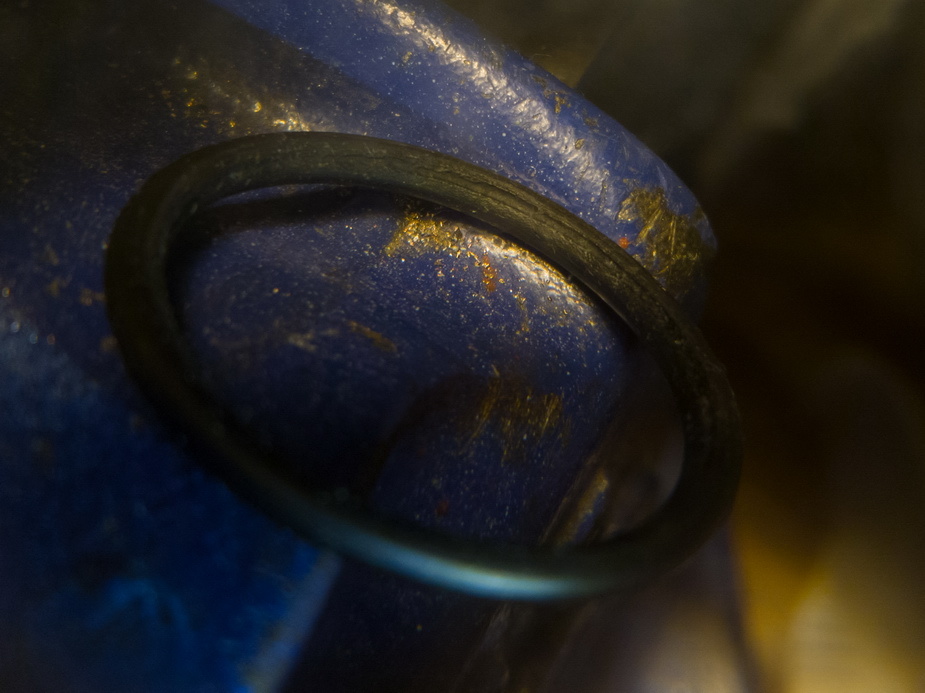
One of the two seals which actually form the gas seal. You can see the damage. It served 21 years… about 3000hrs airborne time so probably 1500 landings
This unusual circlip holds the bottom pin in – it is here G 11,0 and good luck getting it from Germany if you are in the UK It ought to be replaced with a new one

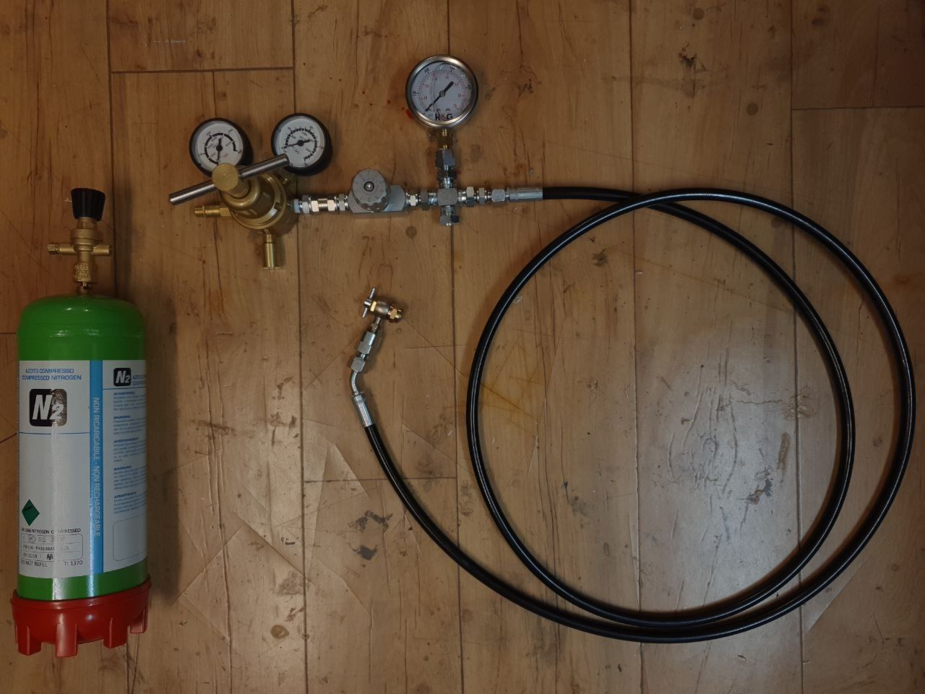
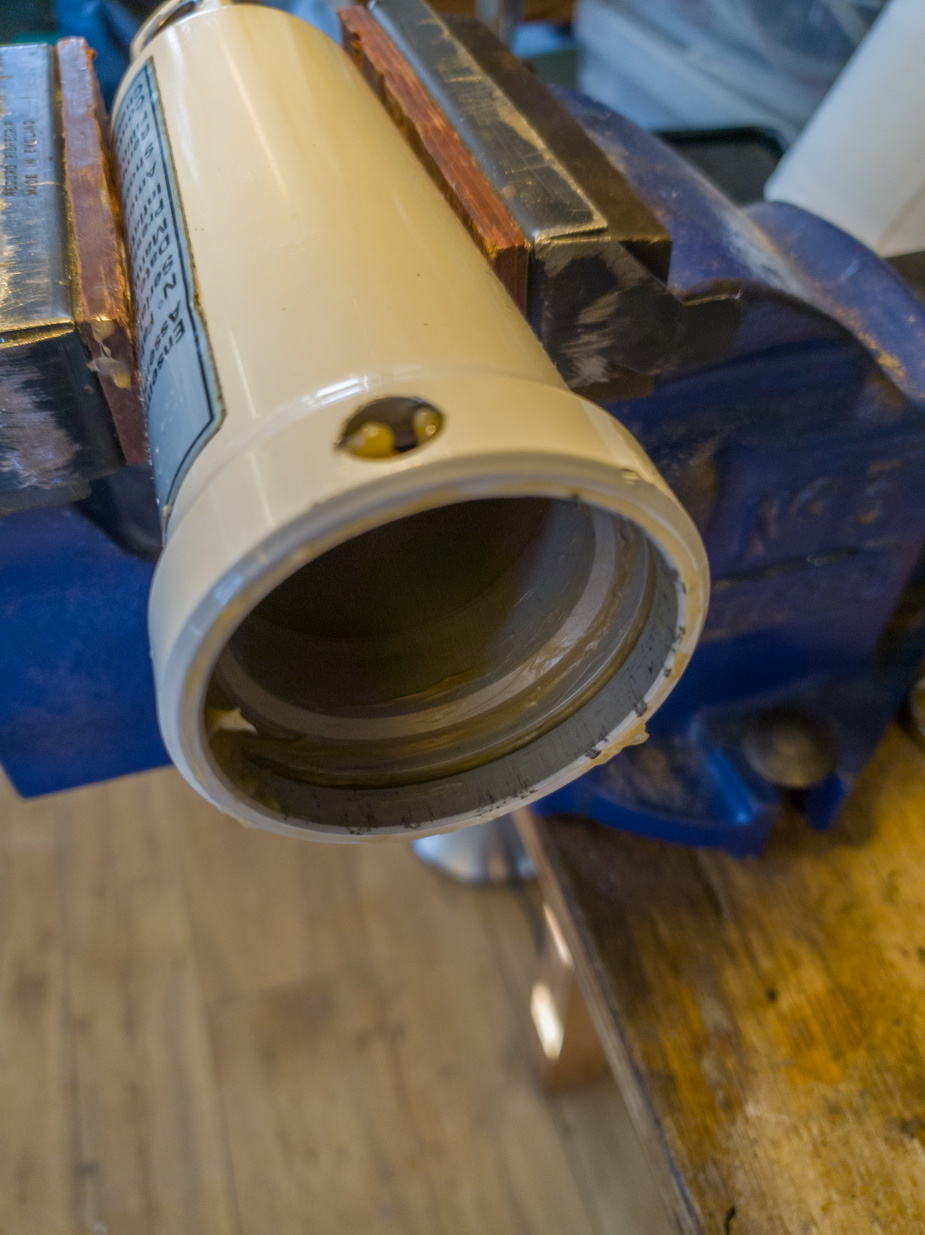
My updated gassing-up rig is this
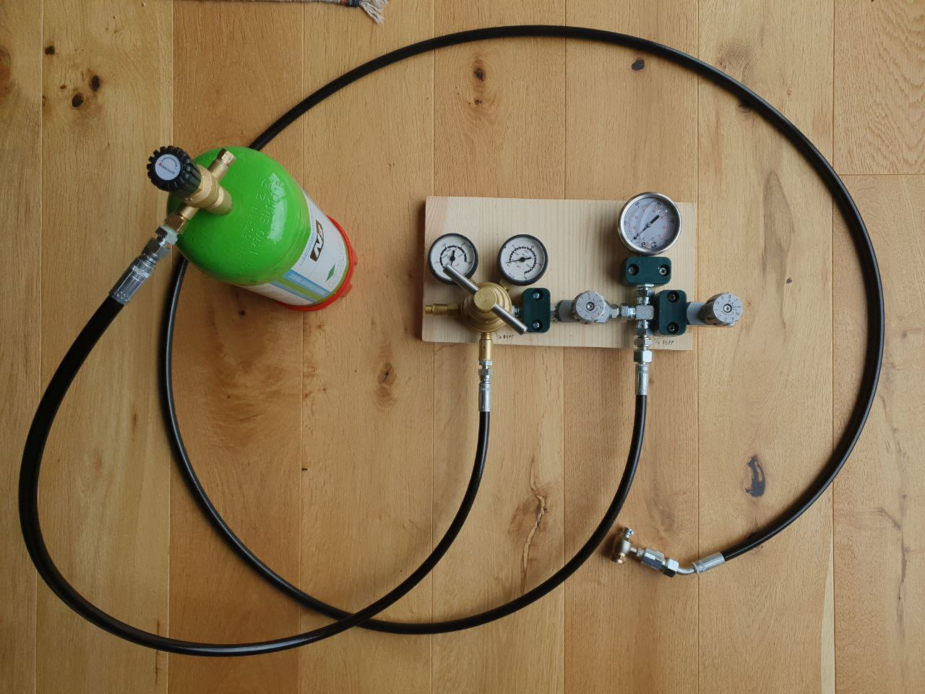
and it uses the 1500psi disposable £40 nitrogen cylinders from Ebay. Custom hoses and other fittings mostly from Hydraulic Megastore, UK.
I’ve updated my TB parts list with OEM equivalents where these could be determined by reading the package markings, and from another extremely helpful TB20 owner who had been up this road before me.
Note that the opening and closing sequence requires the removal and replacement of the valve body. The valve is from Schrader and is a standard industrial part. P/Ns are listed above. You need Loctite 542 to seal the thread.
Total time a few hours, once you know how to do it. In quantity, you could overhaul these units in half an hour
The parts from Socata are amazingly cheap:
2 × 7174118929 valve mechanism => 9.31 euros ea, in stock with Daher
2 × 7423161004 gasket for valve => 3.49 euros ea, in stock with Daher
2 × 7079118718 valve cap => 10.15 euros ea, in stock with Daher
2 × 7061080747 top seal, might now be P/N 40422015 => Yes, correct replacement ! 40422015 : 24.57 euros ea, in stock with Daher
2 × 7423081041 o-ring => 6.60 euros ea, in stock with Daher
2 × 7061080748 o-ring => 5.93 euros ea, in stock with Daher
2 x TB30 41047100 o-ring => 17.32 euros ea, in stock with Daher
2 × 7423821406 o-ring => 6.48 euros ea, in stock with Daher
2 x TB30 41048100 washer => 16.63 euros ea, in stock with Daher
2 x TB30 4100711949 lead plug => Order is variant TB30 41007119 : 4.96 euros ea, in stock with Daher
Sharp people will realise some of the above should be 4 x but I had only one unit to do; the other one is not leaking yet so will be done at the next opportunity.
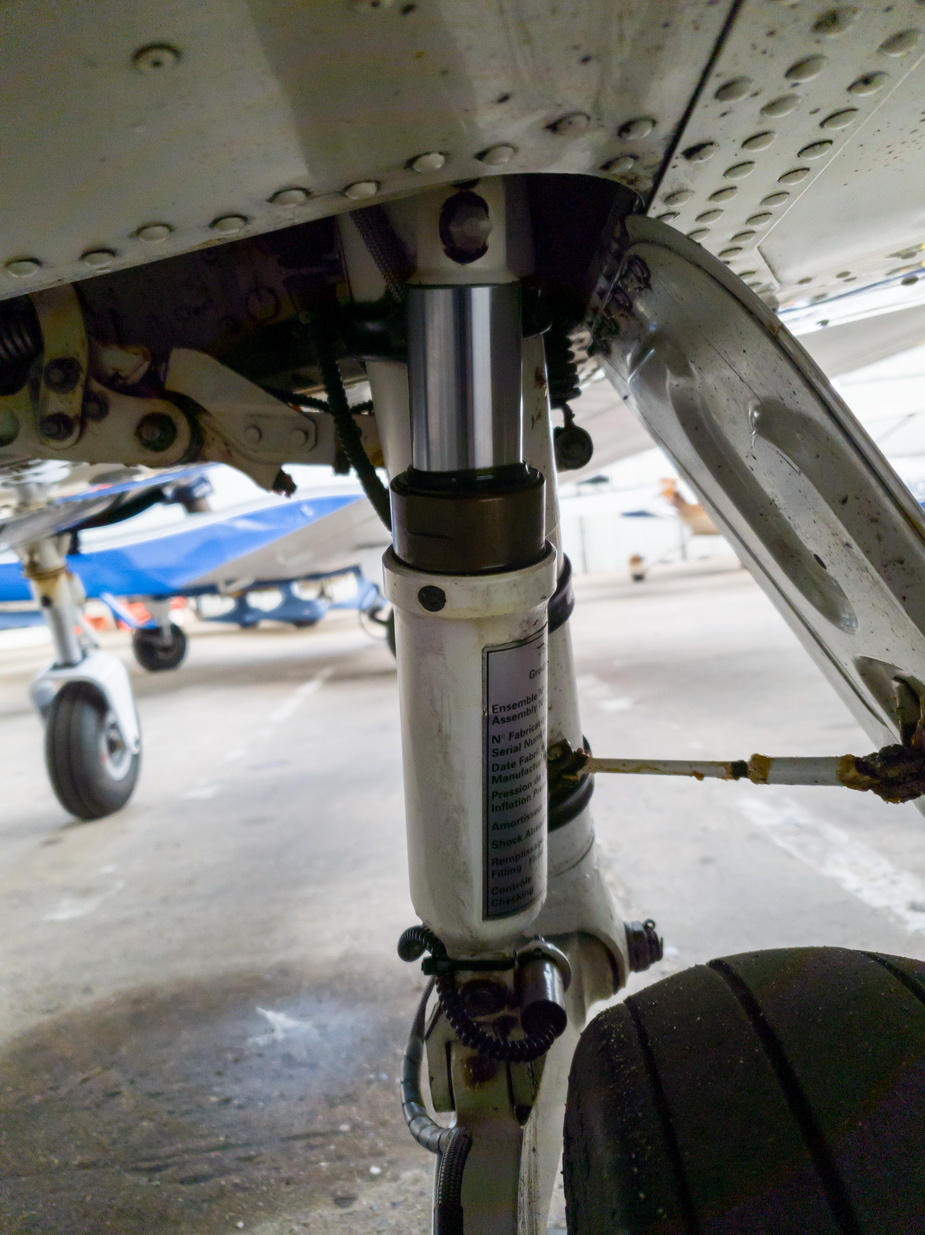
The gassing up needs to be done with the unit installed and on jacks because the pressure is specced (at 666psi) with the unit fully extended. Perhaps you could install it after pressurisation but then you would not be able to rotate the inner rod to align the two ends exactly.
Due to the proximity of the wing bottom to the valve, you need a slightly modified refill attachment
I am now informed by Socata that the manufacturer (a second one) for this gas shock has vanished and it isn’t possible to find these other than from scrap dealers.
So you need to look after them
EDIT: just been informed that a new source has been found. Price is 3347.84 euros plus VAT and shipping. So you still want to look after yours
During tests today, filling up the gas shock with the new rig shown above, 666 psi is the specced pressure, but 10-15 psi around that makes quite a difference to where the aircraft “sits”. So having an accurate rig and gauge is a good idea.
Have you tried to calculate the pressure required to do that? I reckon 2000-3000psi.
It has to be done on jacks and at full gas shock extension. Then you end up with some reasonable figure like 600-800psi.
But if you meant doing that, and then unjacking it and seeing where the aircraft sits, yes that would work.
There is a post on the US Socata owners group, from many years ago, by a guy in Australia, where he says he just pressurised it off jacks until the wings were level. That would be an interesting exercise on the pressure ratings of the various parts, including the t-handle valve adaptor… and you can’t normally get gas bottles above 3000psi.
I am happy to report that the above filling kit does work, works with the 1500psi disposable nitrogen cylinders
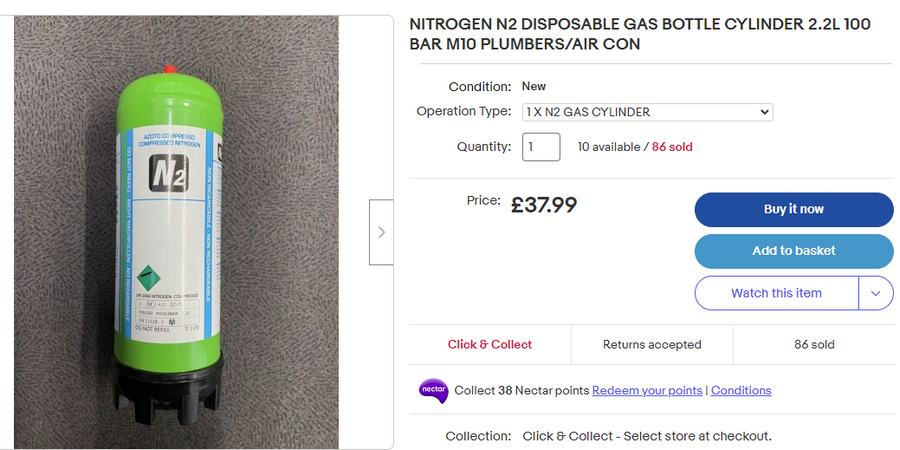
and a refill uses very little gas. Just as well since it looks like most, maybe all, of these “1500psi” cylinders are a con and are actually about 800psi…
The main issue was with this adaptor which screws onto the M10 thread of these disposable cylinders. It seems to be a nasty chinese contraption which needed that thread to be secured (with epoxy). Very few people make this adaptor
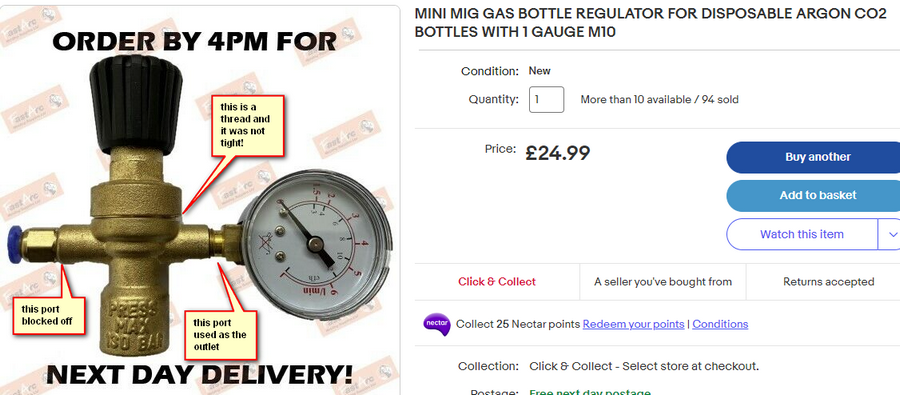
I didn’t use the pressure gauge on it but instead used its fitting to obtain an M8 x 1.0 internal thread for the hose.
It helps to have a workshop
We’ve just overhauled the 2nd one.
There are supposed to be two o-rings inside, working against the sliding rod.
Guess how many this JAR145 EASA145 FAA145 EASA21 DGAC-supervised DGAC certified outfit put in? One
The upper 140
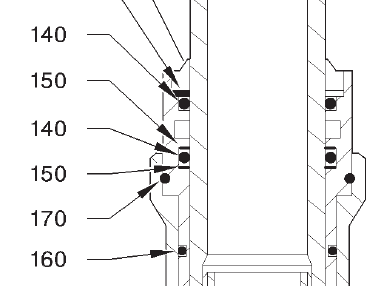
was missing, so the lower one was doing all the work. It was still ok after 21 years…
That o-ring was showing similar damage to the other one (posted before) so it would not have lasted much longer. That gas shock started showing signs of a leak very recently.
Interesting, the liquid which came out of it was a) only about half the right volume and b) quite dirty. A lot of the dirt seems to have come off the anti extrusion spacers (item 150 above, 2-off).
Out of interest, do gas shocks that have fluid as well lose a bit of pressure after the initial fill, due to